
I was recently asked to give a type of demo lesson for a group of Maths Lit teachers, showcasing a Blind Kahoot! The idea behind this demo was to encourage teachers to think beyond the obvious applications and make technology an integral part of their teaching, not just an add-on.
In a Blind Kahoot, you use Kahoot, not as a revision tool, but to introduce a topic and give context and structure to your lesson. For more info on Blind Kahoots, have a look at their website.
Time: 90 minutes (could be split into two lessons)
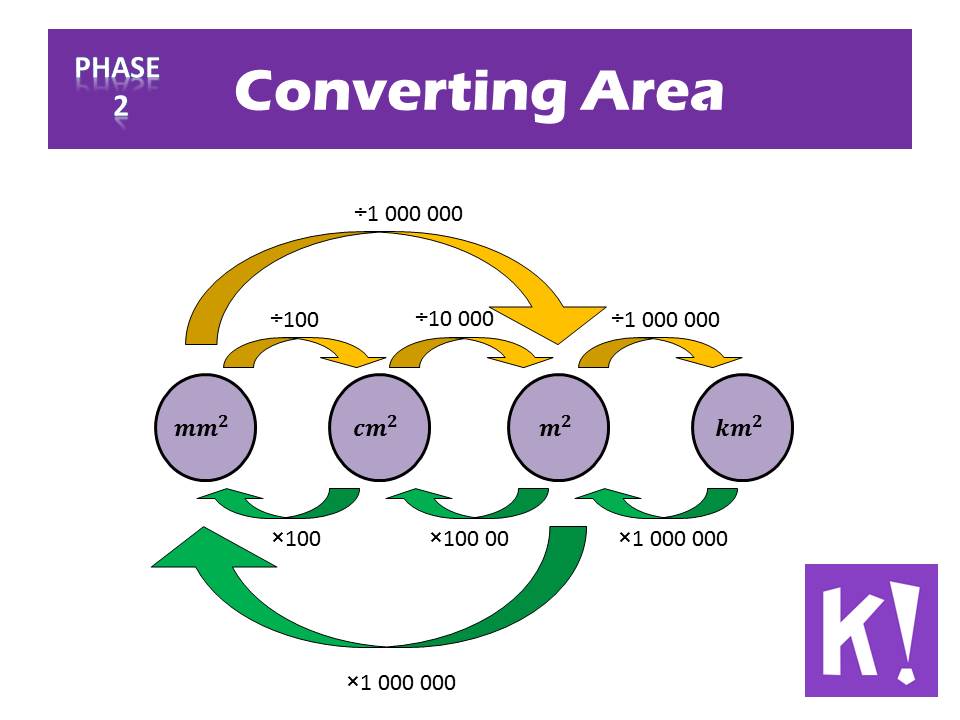
Pre-knowledge: Converting between mm, cm, m and km. This lesson is aimed at learners who has never converted areas.
Equipment: Each student needs their own device. (I often play Kahoot in groups, but I prefer Blind Kahoots to be one-on-one.)
Link: Converting units – A
Lesson:
I divided my lesson into 5 phases.

Phase 1: Start the lesson with QUESTION 1-3 of the Kahoot without giving learners any background. Most of the learners will get the answers wrong since they want to apply the rules for lengths to areas. Complete all three questions before you do any explanations.
Phase 2: Put the devices to the side and teach your regular lesson, explaining how to convert areas and why it is different from lengths.
Use this time to answer all the questions that came up during Phase 1. During this phase, the learners should also copy notes into their books.
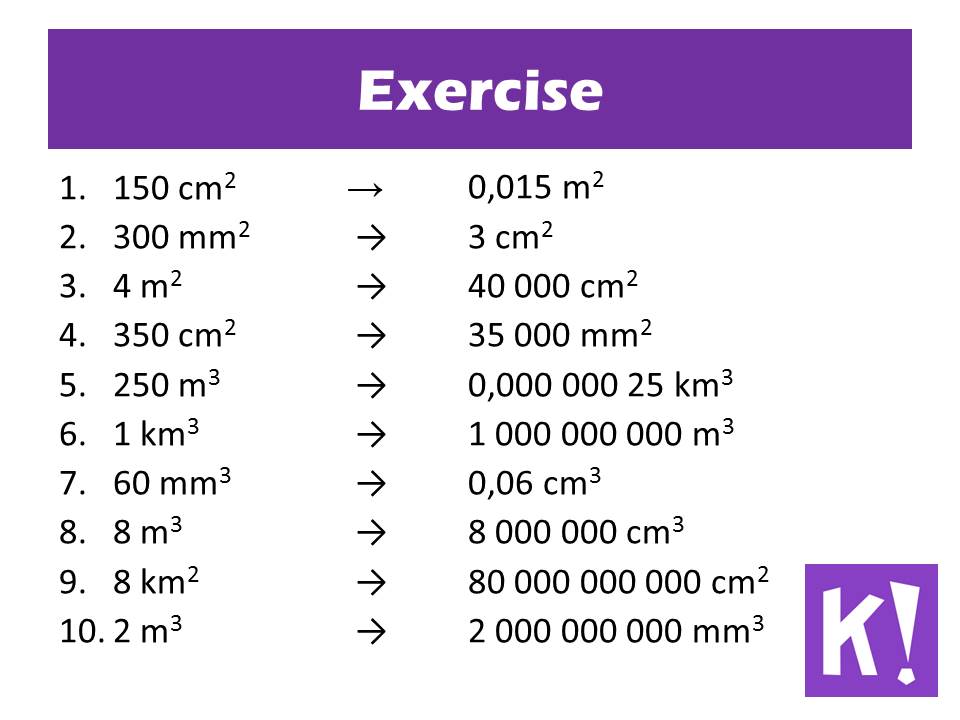
Phase 3: Return to the Kahoot for QUESTION 4-12
Usually, at this stage of the lesson, I would get the learners to do a bunch of conversions to consolidate what they just learned. So all I did was put the exercise in the Kahoot. You will notice that the questions are repeated. However, the second time around the time is less. When the learners know that they are going to continue the Kahoot, they pay a lot more attention during the lesson. By picking my possible answers carefully I also manage to explain some of the misconceptions the kids might have.
Phase 4: Apply your knowledge.
Put the devices to the side again and continue the lesson with more complicated applications.
Phase 5: Best of the best
Return to Kahoot for question 13-15. These questions are quite hard, and unlike the previous phase, learners will need pen and paper to determine the answers. Two minutes are allocated for each question, putting the focus on the calculations and not so much the speed.
Leave a Reply